I am working with procion fiber reactive dyes, using tie-dye and traditional shibori techniques, as well as general fooling around and making messes (my specialty).
First, these are old kitchen towels that were originally white. After years of regular kitchen use, they were so dingy and covered with stains that they finally convinced me (after years of shameless begging, crying and attempts at blackmail) to transform them into LoVely ToWels. They now sit together contentedly smiling at each other. I have to say, I smile a lot at them too. (And what a relief to put all that complaining finally to rest!)


I am also working on a multi-step project, which I call "Moons". I started with 16 squares of white sheeting. I picked four pastel colors and dyed four of each color. That was the first Phase.
Here is a pic of the Second Phase of the Moons, where I used two disks (one on top and the other on the bottom) to create a "resist" and held it together with two clamps. What this means is that the clamps hold the disks tight against the fabric so that the dye cannot penetrate the fabric between the disks. I applied a light blue dye to the rest of the fabric squares.What you see is the result.

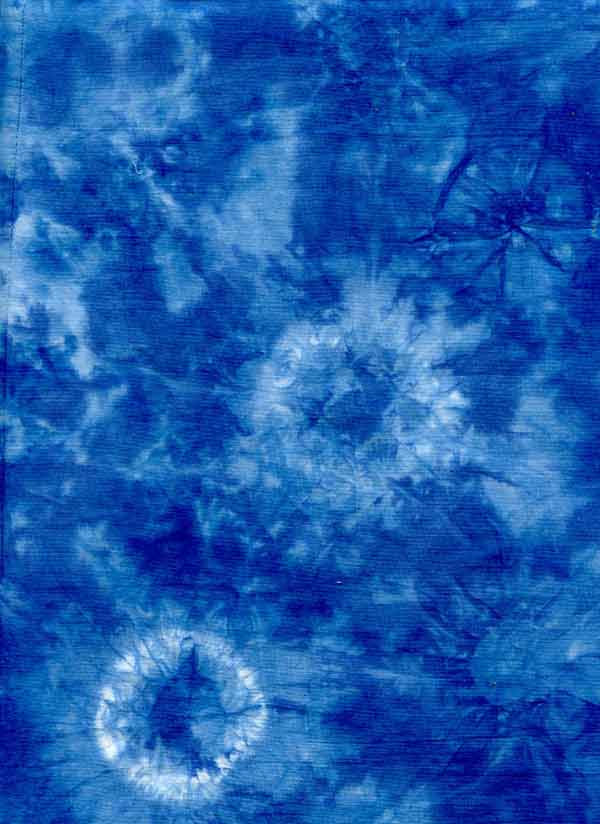
 Here is the Third Moon Phase in progress. This time I am using sun dye. This is quirky stuff. It's comparatively simple to use but I'm not thrilled with the way the dye "moves". You can see the disks placed on top of each square. The ones in the front are glass, wrapped in aluminum foil to provide a resist. The two in the back are solid plastic. Wherever sunlight hits, the fabric will take the dye.
 This is how they came out.
I was able to achieve the corona I was after, so that's good. I don't like the colors yet. The orange and pink moons are hard to tell apart. On the other hand, I have another phase (or more) to go.
I'll post the 4th Phase when it's done. It will be my little surprise for you, dear reader. And for me too.

Meanwhile, here are some other dye projects.
These are mini-lantern shades. I found them in a thrift store, apparently not used. The shades are made of rice paper that had yellowed.
I learned from my experience with the dish towels that it is a wise woman who listens to the cries of her surroundings and so I painted these right away, in two tones, using sun dye.

My sister sent me these overalls and asked me to dye them for her. This would be quite a challenge for me. It's Big, it's heavy (demin), thick (some places four layers thick) and I want her to like it.
So I listened carefully to these overalls and, truth be told, they said ...nothing. Trust, or something like that, takes time.
Her favorite color is orange and she likes cats. (She doesn't just "like" them, she probably is one. Here is the link to her blog. Take a look and you'll see what I mean.)

Here are a few "test" pieces I sent her. Turns out she doesn't like tie-dye patterns, but she likes the shibori one. See the one on the back of the chair, golden veins over off-white? It's a pillowcase. That's the pattern she likes.

 See the piece on the back of this chair? This was my attempt to combine orange, tawny orange, gold and brown in a similar pattern. I was after tiger stripes. In this sense, I felt it was a failure and I named it "fire leg". Turns out my sister liked it.
So the next dyeing session, I over-dyed fire leg with dark brown. The other test pieces will be over-dyed with the shibori pattern. The pillowcase is there for comparison.
Here are some other pieces I just love! (There must be magic dust in the dye powder).
This was made by sewing metal washers to the fabric.

This was folded and wrapped around a pole and then tied. It's the same procedure as "fire leg" and the pillowcase, just with blue dye and tighter wrapping. Poof!

This is a closeup, turned sideways.

I won't even try to describe how I did the next one but this is how it looked before dyeing.
I call it a martian shower cap.

Shazam!
This is how it looked after dyeing.
 Closeup